AnyPortrait > Forum > How to Use
[Archive] Making dismembered bones
- This topic has 0 replies, 1 voice, and was last updated 8 months, 2 weeks ago by
 Archive Account.
-
AuthorPosts
-
July 28, 2025 at 1:40 am #1278
 Archive Account
Q.
I’m making an action game, and I want to make it so that when a character takes damage, they lose their arms or legs.
And I also need the ability to swap them out for other parts.A.
It is impossible to change the skeletal structure of AnyPortrait at runtime.
Therefore, to express the cut, the following trick is needed: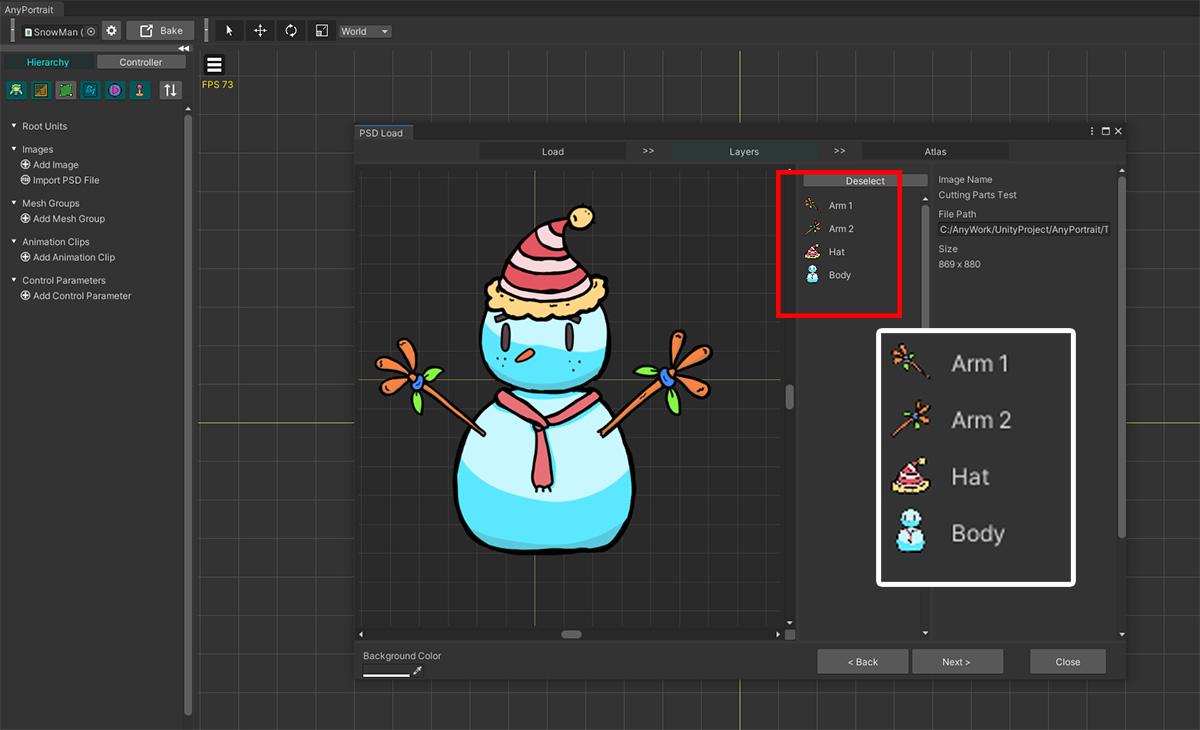
This is the snowman character we prepared.
It simply consists of two arms, a hat, and a body.
We’re going to implement this character’s “Arm 1” to detach and fly away.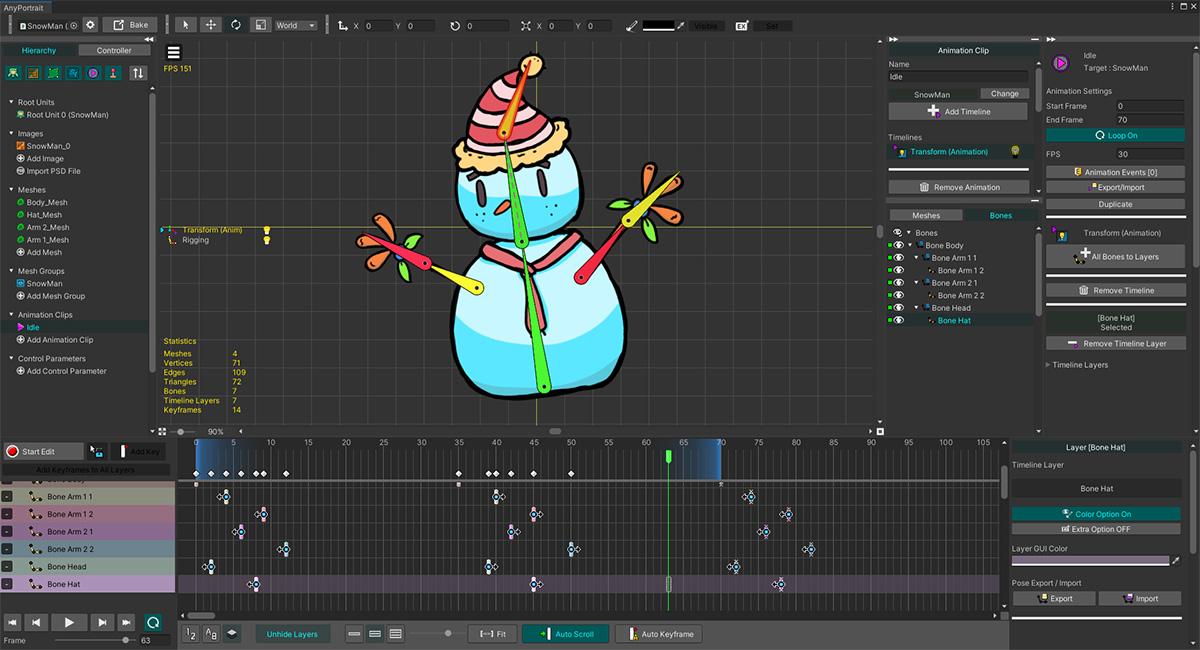
We made animations normally.
Nothing unusual so far.
We will activate the Socket so that an external image equal to “Arm 1” is attached.
(1) Select the mesh group and choose the Bone tab.
(2) Select the bone corresponding to Arm 1.
(3) Enable Socket.Now Bake and go back to the Unity Editor.
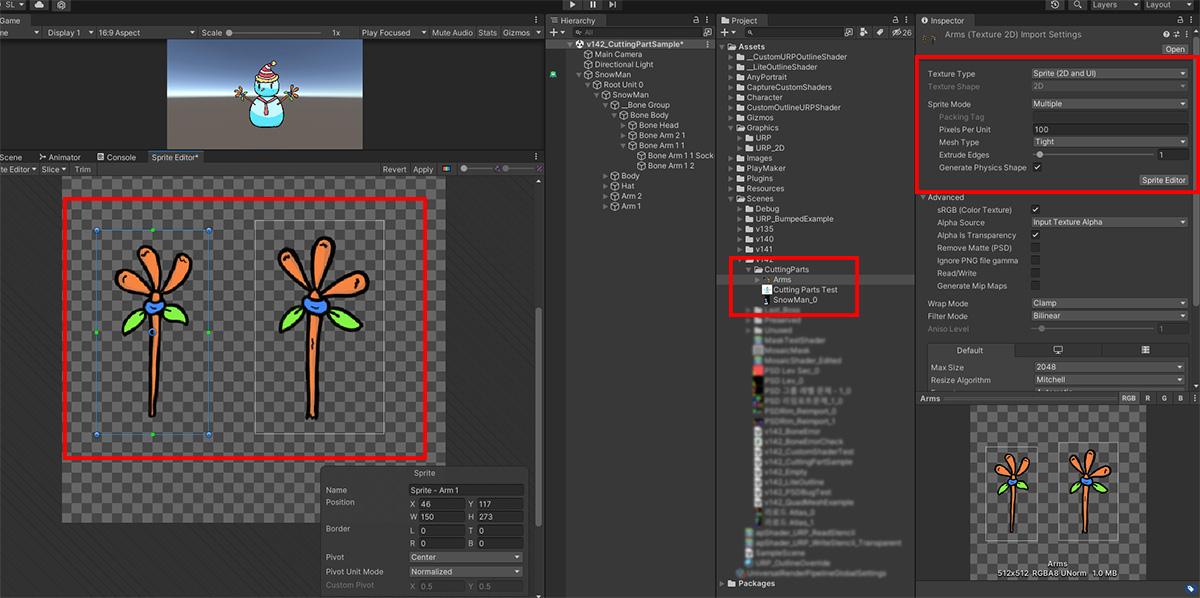
Another image asset with the same appearance corresponding to the arm was prepared as above.
Since these images were imported as a “Sprite” type, we’ll use a SpriteRenderer in the explanation below.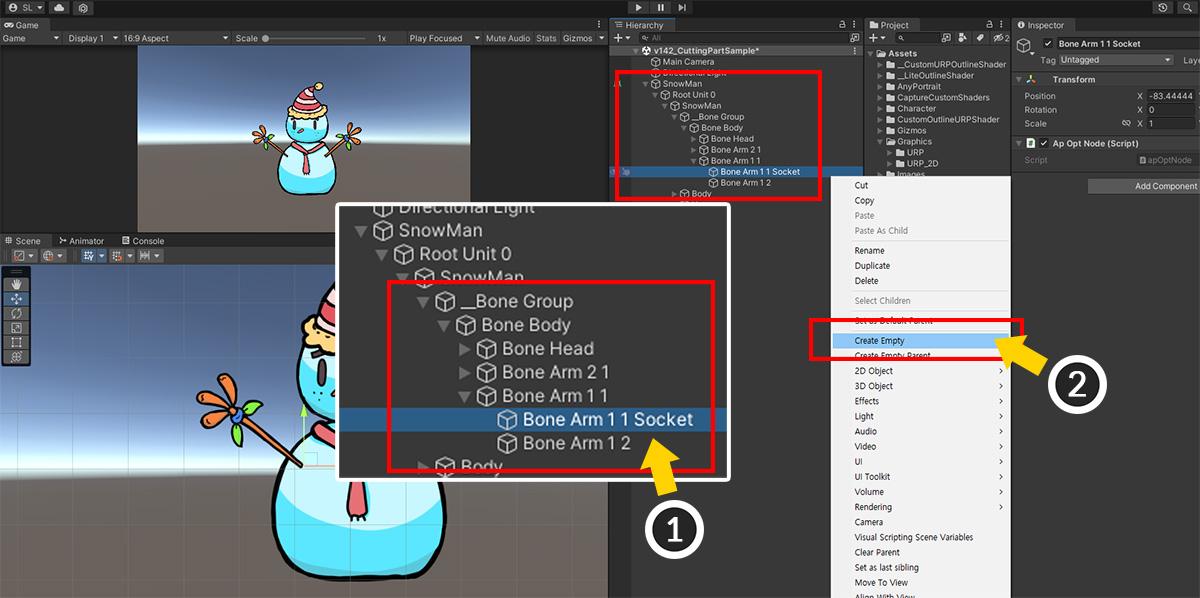
Now let’s find the Socket and create an external “arm object” as its child.
(1) Select a character, and select “Root Unit > (Name of Root Mesh Group) > __Bone Group” in the Hierarchy tab.
Bones will be displayed, and find the GameObject corresponding to the Socket there.
(It will probably have the letters “Socket” appended to its name.)
(2) Add an empty GameObject with Socket selected.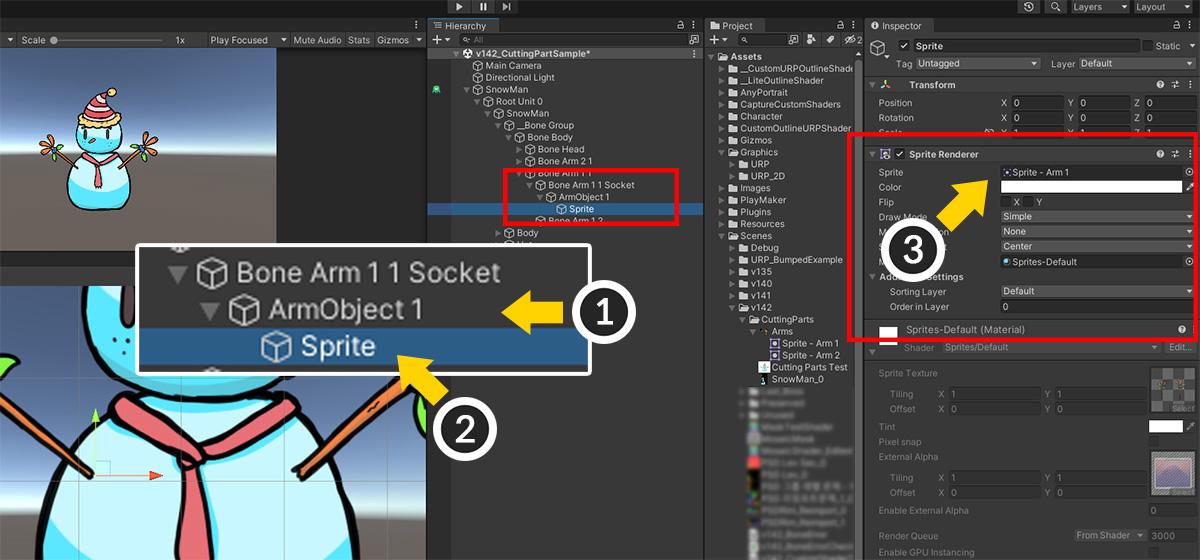
(1) We named the GameObject added as a child of Socket “ArmObject 1”.
(2) Add a new GameObject as a child of “ArmObject 1”. (We named it “Sprite”.)
(3) Add “Sprite Renderer” component to “Sprite” GameObject, and set the prepared “arm image”.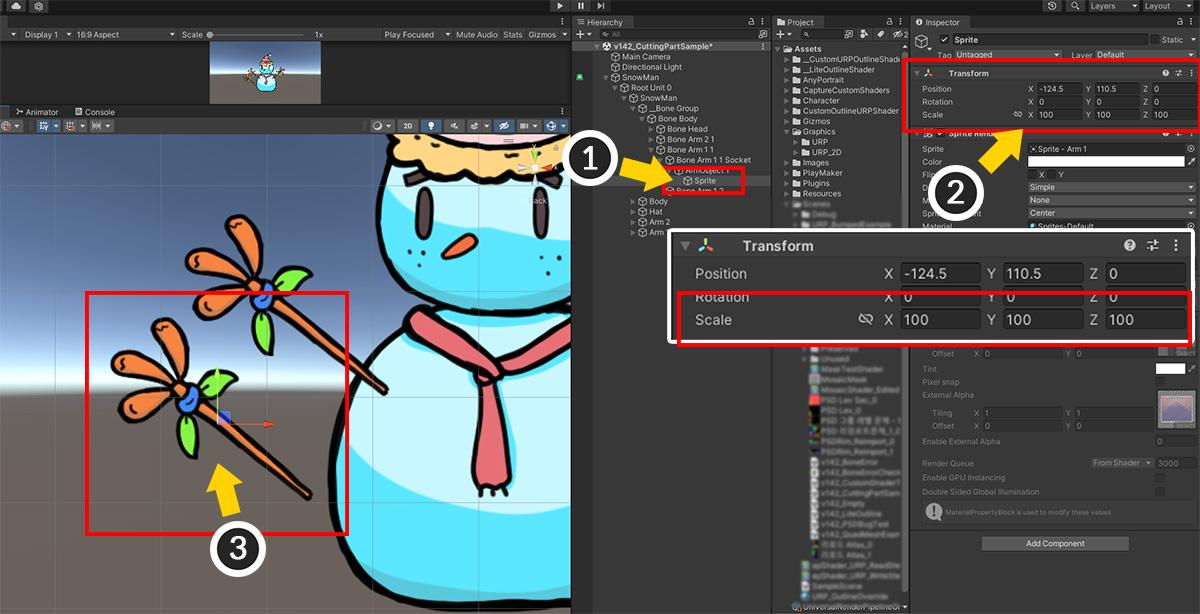
We’ve added an image, but it’s probably not visible on the Scene screen.
It’s because of Scale.
If the Sprite object is equal to AnyPortrait’s default scale, it will typically be scaled to 1/100.
(Due to the AnyPortrait setting.)
(1) Select the “Sprite” GameObject.
(2) Change the Scale value to (100, 100, 100) or an appropriately large value.
(3) The arm image is now displayed according to the size of the AnyPortrait character.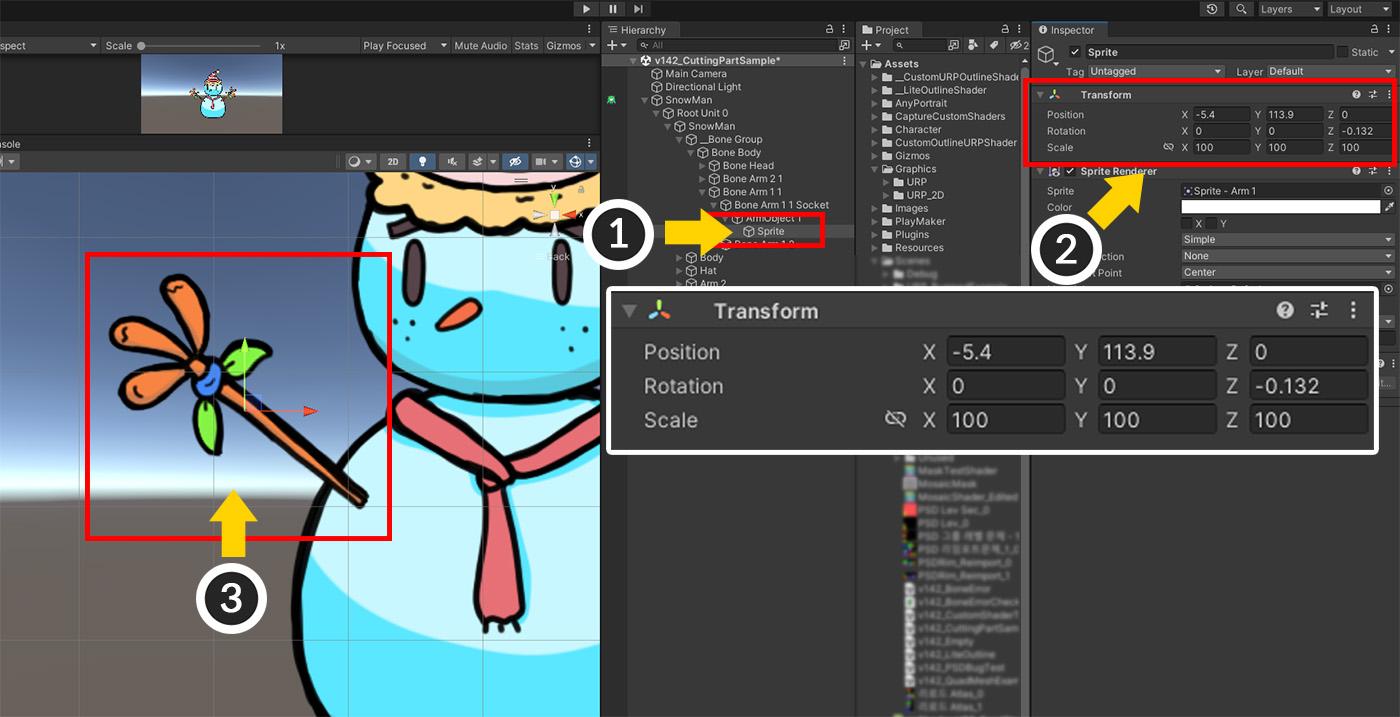
Now we will adjust the position so that the arm image overlaps with AnyPortrait’s arm and hides it.
(1) Select the “Sprite” GameObject. (Do not select the parent “ArmObject 1”.)
(2) Adjust Position and Rotation to make (3) overlap with the original mesh.
It won’t be too awkward if you don’t make it completely overlap.
From here, it is an additional effect of our interest. 🙂
We will add a physics effect to the detached arm.
(1) Select the “Sprite” GameObject.
(2) Add the “Box Collider 2D” component.
(3) Modify the size of the collider to fit the image.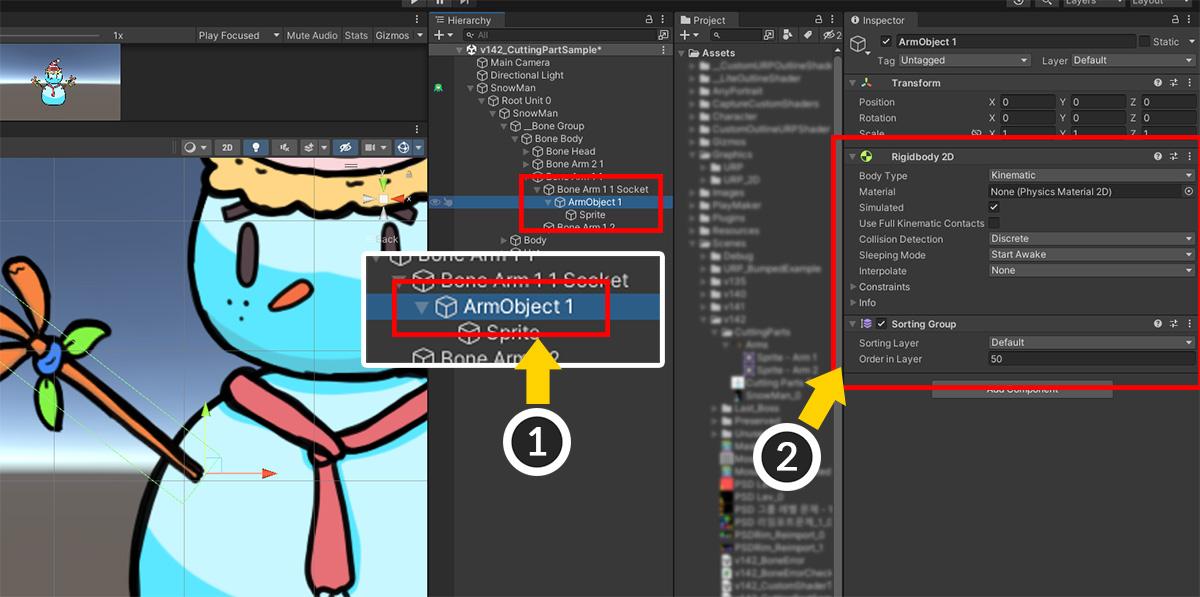
(1) And this time select its parent “ArmObject 1”.
(2) Add a “Rigidbody 2D” object. (Body Type will be managed by script later, so it is recommended to set it to Dynamic and set physical properties.)Additionally, we added a SortingGroup for rendering order.
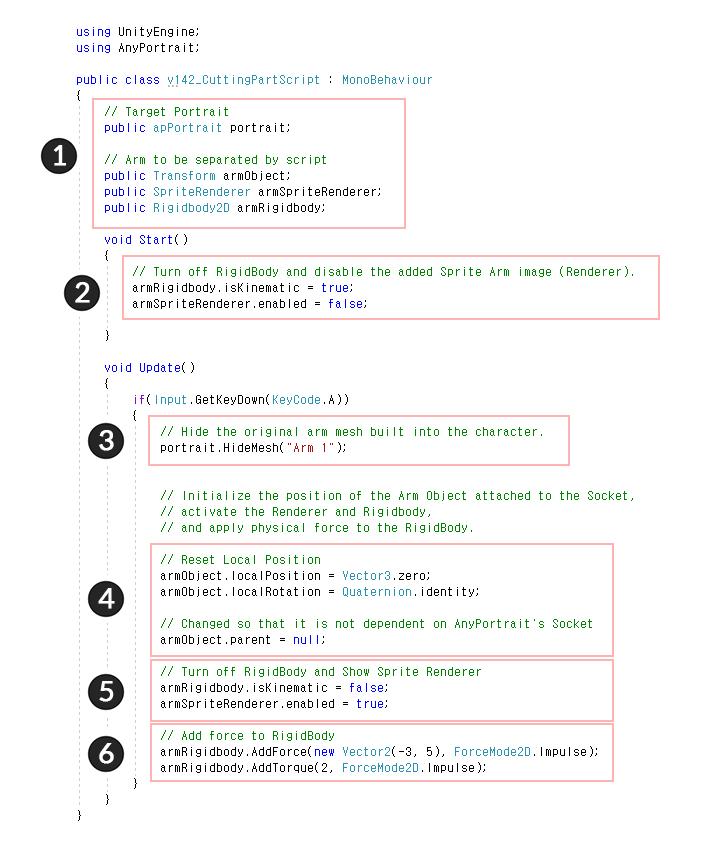
Now write a simple script as above.
The above code contains “pressing the A key on the keyboard hides the original arm mesh (Arm 1), activates an external object (ArmObject 1) at the same location, and then blows away by physical force”.
(1) Declare Transform, SpriteRenderer, and Rigidbody2D corresponding to the arm separated from the AnyPortrait character (apPortrait) to be controlled as members.
(2) At Start, the physical effect of the separated arm is turned off and the sprite image is hidden.
(3) When the A key is pressed, the arm mesh (“Arm 1”) within the original AnyPortrait character is hidden.> (4), (5), (6) contain the activation of the external object (ArmObject 1).
(4) Initialize the position of “Arm Object 1” to be the same as the Socket, and make it independent from AnyPortrait. (The code in transform.parent = null; does the job.)
(5) Activate the physics effect, and activate the SpriteRenderer to make the arm sprite visible. (Making Kinematic false turns physics on.)
(6) Apply a physical force to the Rigidbody to make it fly away.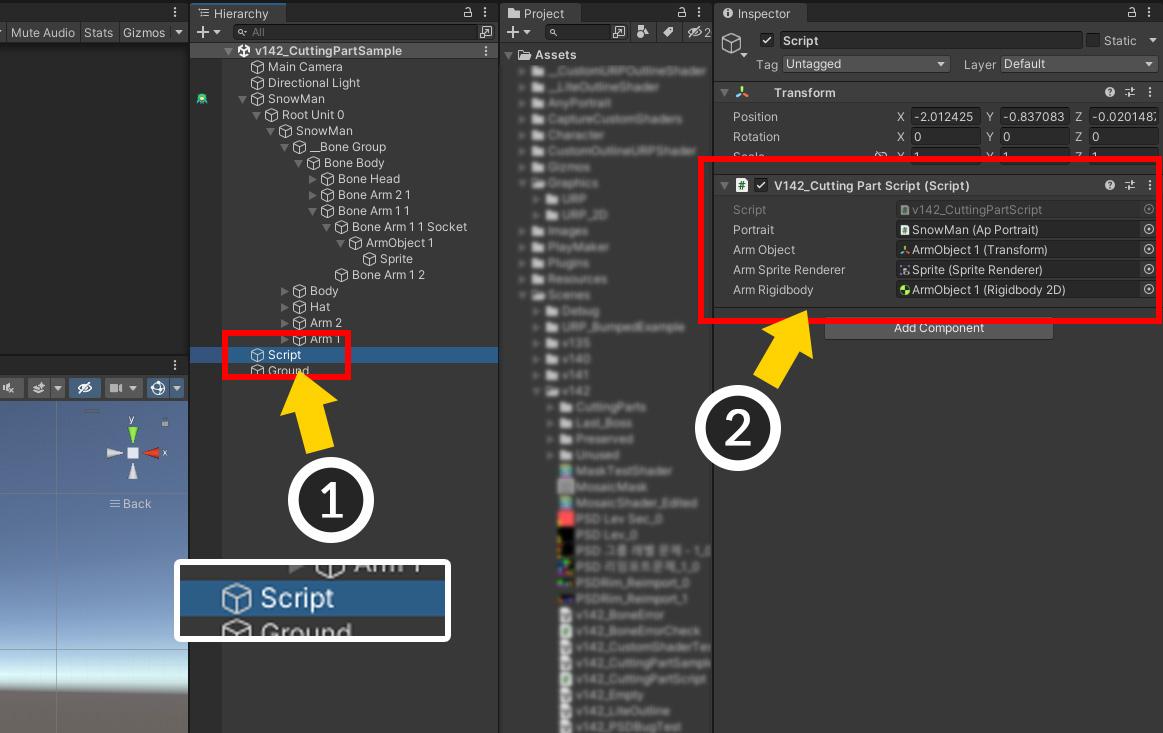
Now, let’s apply the script we wrote to the scene.
(1) Create a new GameObject.
(2) Add the written script and assign objects corresponding to each member.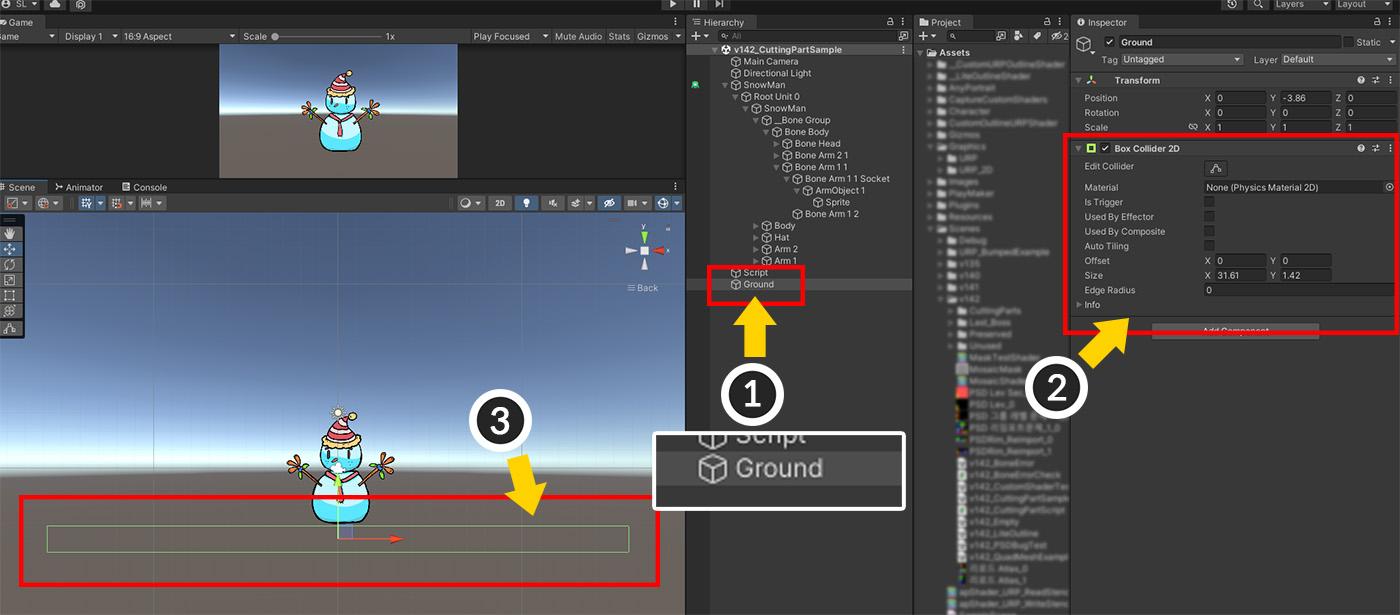
Let’s make ground for the flying arm.
(1) Create a new GameObject.
(2) Add a BoxCollider2D component.
(3) Scale it appropriately so that there is ground under the snowman.
Now let’s run the game.
The animation plays well, and when you press the A key, you can see the arm quickly switch to the external as shown above, and then fall to the ground by the physical effect.This sounds like a perfect example, but there are some things you should be aware of.
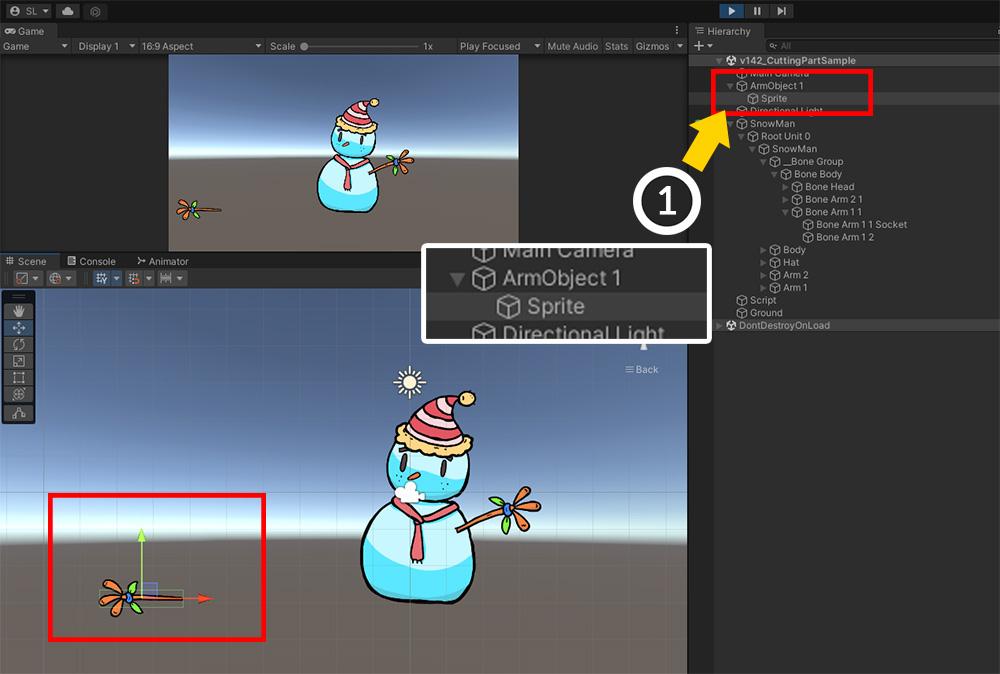
The detached arm (ArmObject 1) is not well controlled because it is completely independent of the AnyPortrait character.
So you will need to improve our code by using the “Instantiate” or “Destroy” functions.Additionally, for character customization, we recommend that you take a look at the following manuals we provide.
https://rainyrizzle.github.io/en/AdvancedManual/AD_CharacterCostume.html
https://rainyrizzle.github.io/en/AdvancedManual/AD_SyncBonesToChangeCostumes.html
https://rainyrizzle.github.io/en/AdvancedManual/AD_AttachEquipments.html
https://rainyrizzle.github.io/en/AdvancedManual/AD_SortingOrderInAttachMesh.html -
AuthorPosts
- You must be logged in to reply to this topic.